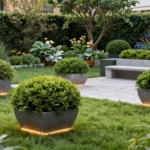
![11 Smart Above Ground Pool Leveling Ideas [Easy DIY Fix]](https://snugfelt.com/wp-content/uploads/2026/04/11-Smart-Above-Ground-Pool-Leveling-Ideas-Easy-DIY-Fix.webp)
Building an above-ground pool can be an exciting project, especially as the hot months approach. However, one common hurdle many people face is ensuring their pool is perfectly level. A well-leveled pool not only enhances your backyard’s appearance but also provides a safe swimming environment. That’s why I created this guide. I want to help you tackle this challenge with confidence and ease.
If you’re a homeowner, a DIY enthusiast, or just someone looking to make the most of your outdoor space, this post is for you. You care about creating a fun, inviting backyard, and having a properly leveled pool is key to achieving that. With the right tips and techniques, you can transform your outdoor area into a summer oasis.
In this article, you’ll discover 11 smart above ground pool leveling ideas that are easy to implement. Each method ranges from simple DIY fixes to more advanced techniques, ensuring there’s something here for everyone. You’ll gain practical knowledge to help make your pool installation a successful one, along with tips on enhancing your overall backyard design. So, let’s dive in and explore how you can create the perfect setting for fun and relaxation!
Key Takeaways
– Identify Your Needs: Understand the specific leveling requirements for your above-ground pool to ensure a stable and safe setup.
– Explore Techniques: Learn various pool leveling techniques, including using a laser level and sand bases, to find the best fit for your landscape.
– DIY Landscaping Tips: Get creative with DIY pool landscaping ideas that enhance aesthetics while ensuring functionality.
– Combination Strategies: Consider combining different techniques for optimal results, like using pavers along with soil or gravel bases.
– Professional Help: Know when to call in professionals if the leveling task becomes too challenging for a DIY approach.
1. Create a Level Sand Base

A sturdy foundation is essential for your above ground pool. Not only does a level sand base offer stability, but it also aids in drainage, helping to prevent water from pooling underneath. This method is straightforward and requires minimal materials, making it an appealing option for many pool owners.
Begin by clearing the area of any grass, sod, or debris that may interfere with the installation. Next, outline your pool’s dimensions with stakes and string, then spread a layer of sand evenly across the space. Finally, use a leveling tool to ensure the sand is perfectly flat.
Key steps for a solid sand base:
– Clear the area of grass and debris
– Mark the pool’s dimensions with stakes
– Spread 2-3 inches of sand evenly
– Use a leveling tool for a flat surface
This method is not only cost-effective but also sets the stage for a successful pool installation.
2. Use Pavers for a Sturdy Base

Elevate your pool setup by using pavers for leveling. These provide a durable base, enhancing the pool’s support while adding a decorative touch to your outdoor area. Installing pavers is a great way to blend functionality with design.
Start by clearing the space just as you would for a sand base. Next, lay down a layer of gravel for drainage, then arrange pavers in a grid pattern, ensuring they are level with one another. Adjust as necessary to achieve a flat surface.
Steps to install pavers:
– Clear the area under the pool
– Add a 3-inch layer of gravel
– Arrange pavers in a grid pattern
– Use a level to check and adjust
Pavers not only support your pool effectively but also enhance your garden’s aesthetics.
Did you know a gravel layer beneath pavers can reduce shifting by up to 40%? Build a level grid, then adjust for a flawless base—this simple step is one of the best above ground pool leveling ideas you can try today.
3. Employ a Laser Level for Precision

For those who value accuracy, using a laser level can ensure your pool is perfectly aligned. While it may require a small investment, the precision it offers is invaluable. This method is straightforward and yields impressive results.
Set up your laser level on a tripod at the center of your pool area. Mark the height at various points around the perimeter with stakes. Use these marks to dig or fill areas as needed to create an even surface.
Steps for using a laser level:
– Set up the laser in the center
– Mark the height with stakes
– Dig or fill based on the marks
This technique guarantees a reliable and level pool surface, preventing alignment issues down the line.
Fun fact: a laser level can shave hours off above ground pool leveling ideas. With just a tripod and steady marks, you’ll hit precision within 1/8 inch—saving digging, redoing, and frustration on your project.
4. Incorporate Retaining Walls

Retaining walls not only enhance your pool’s stability on sloped terrain but also add an attractive feature to your yard. This option combines functionality with visual appeal, creating a stunning backdrop for your outdoor space.
To build a retaining wall, start by selecting materials that complement your garden’s aesthetics. Dig a trench for the wall, lay the first course of material, and backfill the area to secure the pool’s stability.
Steps to build a retaining wall:
– Choose stones, bricks, or timber
– Dig a trench about one foot deep
– Lay the first layer of materials
– Backfill and compact the area
Retaining walls manage water runoff and offer extra seating, adding both beauty and utility to your pool area.
5. Use a Concrete Slab

For long-lasting durability, a concrete slab is an excellent base for your above ground pool. This method creates a solid surface that stands the test of time, ensuring your pool remains level for years to come.
Start by clearing the ground and measuring for the slab. Construct a frame using plywood, pour the mixed concrete into the form, and smooth it out evenly. Let the slab cure for a week before setting up your pool.
Steps for a concrete slab:
– Clear and measure the area
– Build a wooden frame for the slab
– Pour and smooth the concrete
– Allow a week for curing
This approach may require more effort upfront, but the stability and longevity of a concrete slab are worth it.
6. Level with Soil and Grass

For a more environmentally friendly option, leveling your area with soil and grass is a natural choice. This method blends seamlessly into your existing landscape while stabilizing your pool.
Start by assessing the site for any dips or rises, then fill low spots with quality topsoil. Pack the soil tightly, and overseed the area with grass to ensure it blends well with your yard.
Steps for leveling with soil:
– Evaluate the area for uneven spots
– Fill low areas with topsoil
– Pack the soil down firmly
– Overseed with grass seed
This approach provides a natural look while ensuring your pool area stays stable.
7. Wooden Decks as a Leveling Solution

Constructing a wooden deck around your pool adds both functionality and visual appeal. A deck serves as a beautiful transition from your home to the pool, and can be tailored to fit your style.
Begin by planning the deck’s layout based on your pool’s dimensions. Elevate the deck with concrete blocks or posts to match the pool’s height, then build the frame and attach decking boards securely.
Steps for building a deck:
– Design the deck layout and size
– Elevate the area with blocks or posts
– Construct the frame with treated wood
– Attach decking boards securely
This not only enhances the aesthetic but also provides additional lounging space.
Key Trade-offs & Our Top Pick
When you’re leveling your above-ground pool, you have several options. Each has its pros and cons, making it essential to choose wisely based on your specific needs. Let’s break down a few popular options to help you decide.
Option 1: Create a Level Sand Base
– Pros:
– Sand provides excellent drainage, keeping water away from the pool.
– It’s affordable and easy to work with for DIY enthusiasts.
– Cons:
– Sand can shift over time, potentially leading to instability.
– Requires regular maintenance to ensure it stays level.
– Best for: Homeowners looking for a quick, low-cost solution to stabilize their pool.
Option 2: Use Pavers for a Sturdy Base
– Pros:
– Pavers are durable and resistant to shifting or settling.
– They create a solid foundation that enhances the pool’s aesthetic appeal.
– Cons:
– Installation can be labor-intensive and requires precise leveling.
– Higher initial cost compared to sand or gravel options.
– Best for: Those seeking a permanent and visually appealing base for their above-ground pool.
Option 3: Employ a Laser Level for Precision
– Pros:
– Offers accurate leveling, ensuring your pool is perfectly even.
– Saves time by making the leveling process more efficient.
– Cons:
– Requires access to a laser level tool, which may not be readily available.
– Can be overkill for smaller or less complex installations.
– Best for: DIYers who want a professional-level finish and are comfortable using tech tools.
Option 4: Incorporate Retaining Walls
– Pros:
– Retaining walls can prevent soil erosion and provide extra support.
– They allow for creative landscaping options that enhance your backyard design.
– Cons:
– Building retaining walls can be costly and labor-intensive.
– Requires knowledge of local regulations and potential permits.
– Best for: Those with sloped yards who want both a functional and attractive solution.
Option 5: Use a Concrete Slab
– Pros:
– Extremely durable and long-lasting, providing a solid base.
– Minimal maintenance required once installed.
– Cons:
– Higher cost and more involved installation process than other options.
– Not as easily adjustable if you need to change pool levels later.
– Best for: Homeowners looking for a long-term, maintenance-free solution.
Expert Recommendation:
Best Overall: Use Pavers for a Sturdy Base
Choosing pavers is often the best option for most pool owners. They provide a perfect balance of durability, aesthetics, and ease of use. While they may have a higher upfront cost, their long-term stability and ability to enhance your backyard design make them worth the investment. Plus, once installed, you won’t have to worry about constant maintenance or shifting, allowing you to enjoy your pool season after season.
Why We Picked This:
While pavers are our top pick, you might prefer other options based on your specific circumstances. For example, if you’re working with a tight budget, a sand base might suit you better. If you’re looking for a more permanent solution and have the budget for it, concrete slabs could be the way to go. Your choice ultimately depends on your budget, DIY skills, and long-term plans for your outdoor space.
8. Utilize Concrete Blocks

Concrete blocks offer a solid and practical solution for leveling your above ground pool, particularly for DIY enthusiasts. They are durable, easy to work with, and budget-friendly.
Start by clearing the area, then arrange the blocks in a flat area beneath the pool. Ensure they are level and compact the soil underneath for stability.
Steps for using concrete blocks:
– Clear the ground thoroughly
– Arrange blocks in a flat pattern
– Compact the soil beneath them
– Check for levelness as you set up
This method allows for a quick and effective way to create a reliable base for your pool.
9. Consider a Gravel Base

Gravel is a fantastic choice for leveling, particularly in areas prone to drainage issues. This method encourages water runoff and is simple to manage.
Clear the area first, then pour a layer of gravel evenly across the base. Pack it down tightly to create a solid surface, and ensure it’s level before proceeding with your pool.
Steps for a gravel base:
– Clear the area of debris
– Spread 3-4 inches of gravel evenly
– Pack the gravel down firmly
– Check the level before installation
This solution is especially beneficial in rainy regions, preventing water accumulation beneath your pool.
10. Use a Combination of Techniques

Blending different leveling techniques can provide the best results tailored to your backyard. Combining methods ensures stability and enhances the visual appeal of your pool area.
Start with a sand base for drainage, then add pavers or blocks for support. Finish with a deck or retaining wall to enhance the overall look.
Steps for a combined approach:
– Lay a sand foundation first
– Add pavers or blocks for stability
– Incorporate a deck or wall for charm
This flexible approach allows you to address specific challenges while ensuring your pool is secure and visually appealing.
Did you know that using a sand base along with pavers and a deck can boost stability in above ground pool leveling ideas by making the area both sturdy and stylish? Blend techniques for lasting support and curb appeal—start with sand, add blocks, finish with a deck.
11. Invest in Professional Help

If the project feels overwhelming, hiring a professional can save you time and guarantee a flawless installation. Experts have the right tools and knowledge to tackle complex terrains and provide insights that could be beneficial.
When choosing a professional, research local experts and read reviews. Get multiple quotes to compare pricing, and ask questions to fully understand the process and materials used.
Steps for hiring a pro:
– Research pool installation companies
– Collect multiple quotes for comparison
– Ask questions about the process
While DIY projects can be rewarding, sometimes it’s best to leave it to the professionals for larger installations.
Conclusion

Your above ground pool should be a source of joy, not stress.
With these smart leveling ideas, you can create a safe, inviting space that complements your backyard beautifully.
Whether you choose DIY methods or professional assistance, your pool will surely enhance your outdoor experience for years to come.
Note: We aim to provide accurate product links, but some may occasionally expire or become unavailable. If this happens, please search directly on Amazon for the product or a suitable alternative.
This post contains Amazon affiliate links, meaning we may earn a small commission if you purchase through our links, at no extra cost to you.
Frequently Asked Questions
What are the easiest DIY pool leveling techniques for an above ground pool?
Here’s a practical way to start with above ground pool leveling ideas using simple materials. Begin by laying out a level reference around the pool site with a long straightedge and a water level or laser level to map high and low spots.
Choose a forgiving base like compacted sand or fine gravel, then add or remove material in small lifts (about 1–2 inches) to bring the bottom to true level. Tamp or compact each lift and recheck with your level as you go.
If your pool has adjustable feet, place them on flat pads or pavers to distribute weight and prevent sinking. Finish with a stable border or edging to hold the base in place and keep drainage flowing away from the pool. This approach mirrors common pool leveling techniques and fits DIY pool landscaping and above ground pool leveling ideas for your backyard.
What materials and steps do I need to level an above ground pool and keep it stable?
To tackle leveling, gather a few essentials: base material (sand or fine gravel), level (long carpenter’s level or laser level), flat pads or paving stones for the feet, a tamper or compacting tool, shovel, and a straightedge.
Steps: 1) clear the area and mark a level reference around the pool. 2) lay down a base and spread in thin lifts. 3) compact each lift and recheck level across the site. 4) position feet on flat pads or pavers to distribute weight. 5) add a border or edging to keep material from shifting and ensure drainage away from the pool. This plan aligns with pool leveling techniques and supports above ground pool installation and DIY pool landscaping goals.
How can I blend pool leveling ideas with DIY pool landscaping and backyard design tips?
Leveling the pool is just the start—make it part of your outdoor design. Choose base materials and edging that complement your garden beds, pathways, and seating area for a cohesive look. Use natural stone, decorative pavers, or wooden deck accents to turn the leveling base into a visual feature rather than a practical afterthought.
Plan drainage and consider raised plant borders or gravel paths that guide water away from the pool. This way, you’re layering DIY pool landscaping and backyard design tips while keeping your above ground pool leveling ideas functional and beautiful.
What common mistakes should I avoid during above ground pool installation and leveling?
Avoid these pitfalls to keep the project smooth: not leveling the ground before placing the base, ignoring drainage (water pooling can shift the base), using the wrong base material (stone or thick mulch can cause instability), skipping rechecks after lifts, and neglecting to account for climate and freeze–thaw cycles. Also, don’t place the pool on a slope without a proper plan—uneven settling can lead to liner damage. Sticking to proven pool leveling techniques and keeping your DIY pool landscaping goals in mind will help you achieve a stable, long-lasting setup as part of your above ground pool leveling ideas.
How long does leveling an above ground pool typically take and what maintenance is required afterward?
For a small to medium pool, leveling can take a few hours up to a day, depending on ground conditions and the base material you choose. After leveling, monitor the area for settling, especially after heavy rains or freeze–thaw cycles. Maintenance includes rechecking level periodically, keeping the base clean of debris, topping up sand or gravel if settling occurs, and ensuring drainage continues away from the pool. With a little routine care, your above ground pool leveling ideas will stay solid and your backyard will stay welcoming as part of outdoor space enhancement.


![15 Best Spring Window Box Planting Ideas [Early Blooms]](https://snugfelt.com/wp-content/uploads/2026/04/15-Best-Spring-Window-Box-Planting-Ideas-Early-Blooms-150x150.webp)